Garrattfan's Modelrailroading Pages
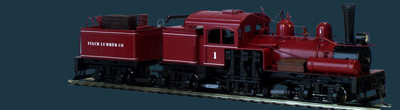
MDC 3tr Shay
First trials
December 30, 2005
The Shay was now reaching a stage where first trials could be held. First I clamped the frame upside down in my vise, testing each truck separately if it was running smoothly without binding. Time and time again I detached the trucks and made small adjustments.

Testing the trucks separately
It was now time to test the model on its "feet". But before doing that first the electrical wipers and wiring should be installed in the trucks. Johnston clearly advises to abandon the original wipers. At first I was a little sceptical, it couldn't be that bad. I can assure you: it was that bad. The manufacturers wipers that come with the kit are perfectly unsuitable. Please run to your local store at first sight!! As I mentioned earlier the wipers I got came with the kit from the previous owner so I needn't bother.
Installing the wipers wasn't a big deal but I made a small but unrecoverable error. In the middle, around the attachment hole, the wipers were somewhat oversized covering the lower hole of the side frame attachment. So I simply cut the access material. In hindsight I should trimmed away no more than the small portion over the hole. In that case the wipers would also have been held in place by the second hole. As I cut it now it has a little free play and they are usually not level in the trucks. Although the wipers to their job it just doesn't look very neat.

The wipers in their original form

The wiper as I cut it in red.
The green line approximates the line I should have cut. Had I done that the wipers would have stayed in place much better. I must admit I made a novice error: I cut all six wipers before even trying to fit them. One piece of good advise: cut one, try one, before you do the rest :-(
Contrary to the description of Jeff Johnston I installed the wipers on the inside of the wheels. The form of the wipers more or less dictates that. It has the advantage that the wipers will not get dirty very easily. I bent the wipers so that there is a clear point of contact with sufficient pressure..

The result.
By now it was time to test each truck to see if the current was passed flawlessly to the motor.

After each truck had been tested and corrected if necessary, I temporarily installed the trucks, connected the wires, held my breath and...

Tada!!! It ran.
Not evenly but quite convincing
I spent the rest of the day tuning and tweaking the mechanism. Searching, analyzing, cursing (oops), disassembling, reassembling, despairing. At the end of the day I wasn't completely satisfied but I least I knew I was going to solve all problems one way or another.
Addendum 2021
Despite being publised as far back as December 2005 these pages continue to attract attention all over the world. The MDC Shay section of my website are among the most visited pages of my site. In general the response is that these pages are helpful to build the MDS Shay and that is exactly what these pages are about: to share the joy and the knowledge and help other modellers.
In January 2021 I found an entry in my Guestbook of a fellow builder who built no less than 6 MDC Shays. The ensuing conversation brought a very useful tip to light. I will let Bob do the talking:
"One aspect of the rebuild discovered was once they were rebuilt, all ran at a different speed. Thinking through the process, your article discussed motor alignment and I did that exercise in the initial rebuild. The gear box mounting was the next stop on my list. The two screws that attach the gearbox to the underframe were my next experiment. I don't think the following is in your article. I learned to tighten one screw that didn't affect the rpm and then tighten the remaining screw to hold the maximum rpm and then cement that screw to prevent it from becoming loose. Amazing the increase in speed of a few of the Shays."
and to clarify Bob sent me a photo:

Bob kindly provided me in case you might want to contact him on the subject.

Sign my
GuestBook